
Authentication
Marketo’s REST APIs require authentication using 2-legged OAuth 2.0. To authenticate, you need to provide client IDs and client secrets that are generated from custom services you create. Each custom service is owned by an API-only user with specific roles and permissions that allow the service to perform certain actions. An access token is generated for each custom service, and the expiration of that token is not affected by other custom services in the instance.
Note: For the creation of the Client ID and Client Secret Requires Following
Step: 1
- Creation of Role for API Only User
- Navigate to the admin area of the Marketo application.
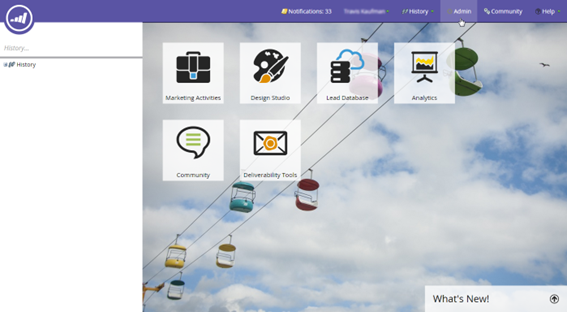
- Click on the Users & Roles node on the left panel.
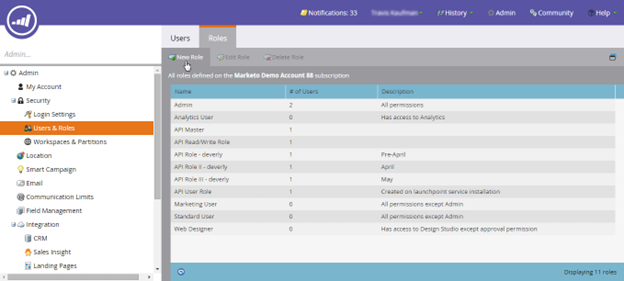
- Create a new role. Reveal the list of role permissions by clicking Access API.
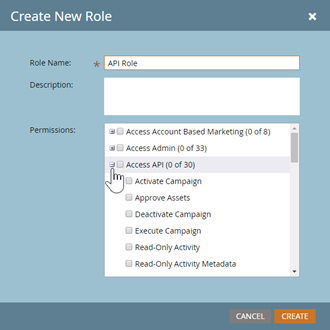
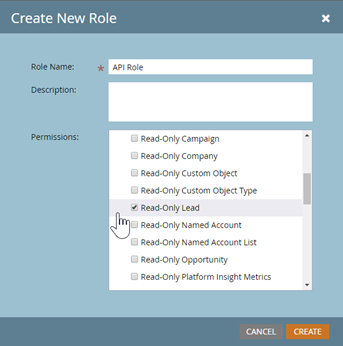
- Now scroll down and select only the permissions that you need.
Step: 2
- Here are the steps to create an API-Only user and associate it with the API role in Marketo:
- Create an API role in Marketo that defines the level of access that the API-Only user will have.
- Navigate to the “Users & Roles” section select Users in Marketo
- Click the “New” button to create a new user.
- Check the “API-Only user” checkbox during the user creation process.
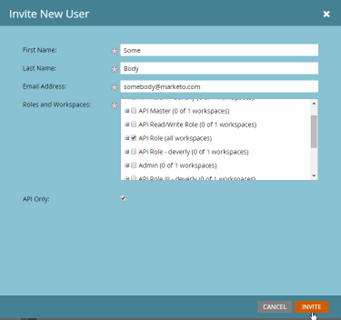
- Select the API role that you created in step 1 to associate with the API-Only user.
- Save the user settings.
Step: 3
- Here are the steps to create a Custom Service in Marketo:
- Log in to Marketo as an administrator.
- Navigate to the Admin section in the top navigation bar.
- Click on “LaunchPoint” in the left-hand menu.
- Click the “New” button to create a new service.
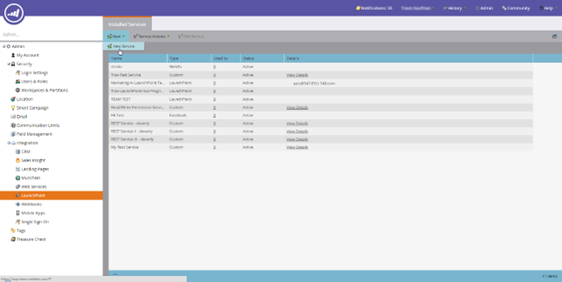
- Fill in the required fields to define your Custom Service, such as the name and description.
- Under the “Access” section, select the appropriate API permissions for your Custom Service.
- Under the “API” section, select the API-Only user that you previously created on Step: 2 to associate with this Custom Service.
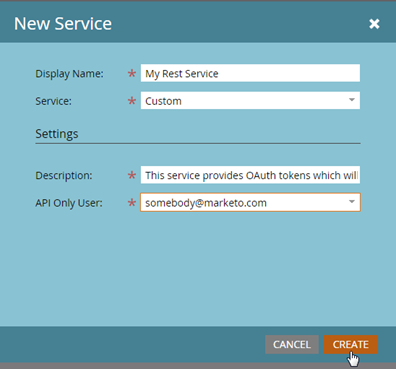
- Save your Custom Service settings
Step: 4
Prerequisites For Marketo Access for API
- Client ID
- Client Secret
- Identity URL
Creating an Access Token
To create an access token, you need to have the Client ID and Client Secret.
- These can be found in the Admin > LaunchPoint menu.
- Select the custom service for which you want to create the access token.
- Click on the “View Details” button.
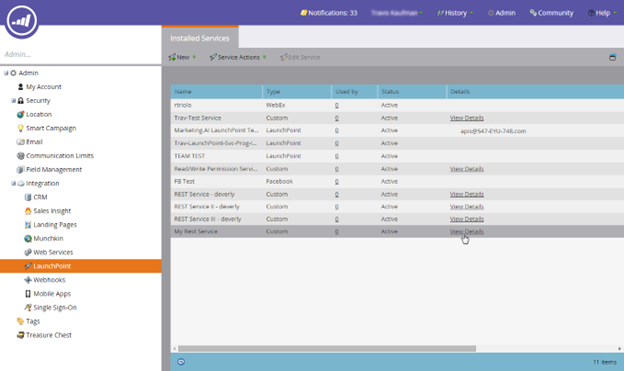
- You should now see the Client ID and Client Secret that you can use to generate the access token.
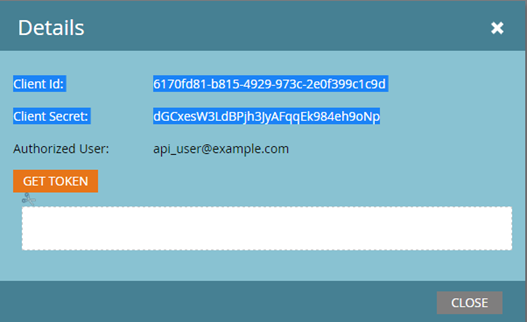
- Create an access token using an HTTP GET (or POST) request like so
GET <Identity URL>/oauth/token?grant_type=client_credentials&client_id=<Client
Id>&client_secret=<Client
Secret>- If your request was valid, you will receive a JSON response similar to the following:
{"access_token":
"cdf01657-110d-4155-99a7-f986b2ff13a0:int",
"token_type":
"bearer",
"expires_in":
3599,
"scope":
"apis@acmeinc.com"}- Response Definition
- access_token – The token that you pass with subsequent calls to authenticate with the target instance.
- token_type – The OAuth authentication method.
- expires_in – The remaining lifespan of the current token in seconds (after which it will be invalid). When an access token is originally created, it’s lifespan is 3600 seconds or 1 hour.
- scope – The owning user of the custom service that was used to authenticate.
- access_token – The token that you pass with subsequent calls to authenticate with the target instance.





Leave a Reply