ETL Email Notification
Email Check With Selenium
17-01-2021
Pawan Rai
Goal To Achieve
Checking the ETL Email and Verify if Any Emails Are Missing
On the Regular basis We Receive Eighteen Email
From Which 9 Email For Stats of ETL and Other Nine Emails are with Platform Name and Status is Passed or Fail
But Main Concern Starts Where we Do not Received Email For a ETL for Two or Three Day
There has to be a Person Who need to Sit and Make and Test Which ETL Emails are Missing.
It Possible but think a Situation Where the ETL Email Across 100 Email a Day
Then Manual Checking for the Email is not Possible, But Selenium Program Can handle This Situation with the help of Python.
To Achieve This I need To login company’s Email to chrome.
I do not have outlook or Microsoft office subscription
Move to Secondary option Connecting Gmail to Company’s Email
How to connect Gmail to Company Email.
To Received and Send Emails Directly From Gmail
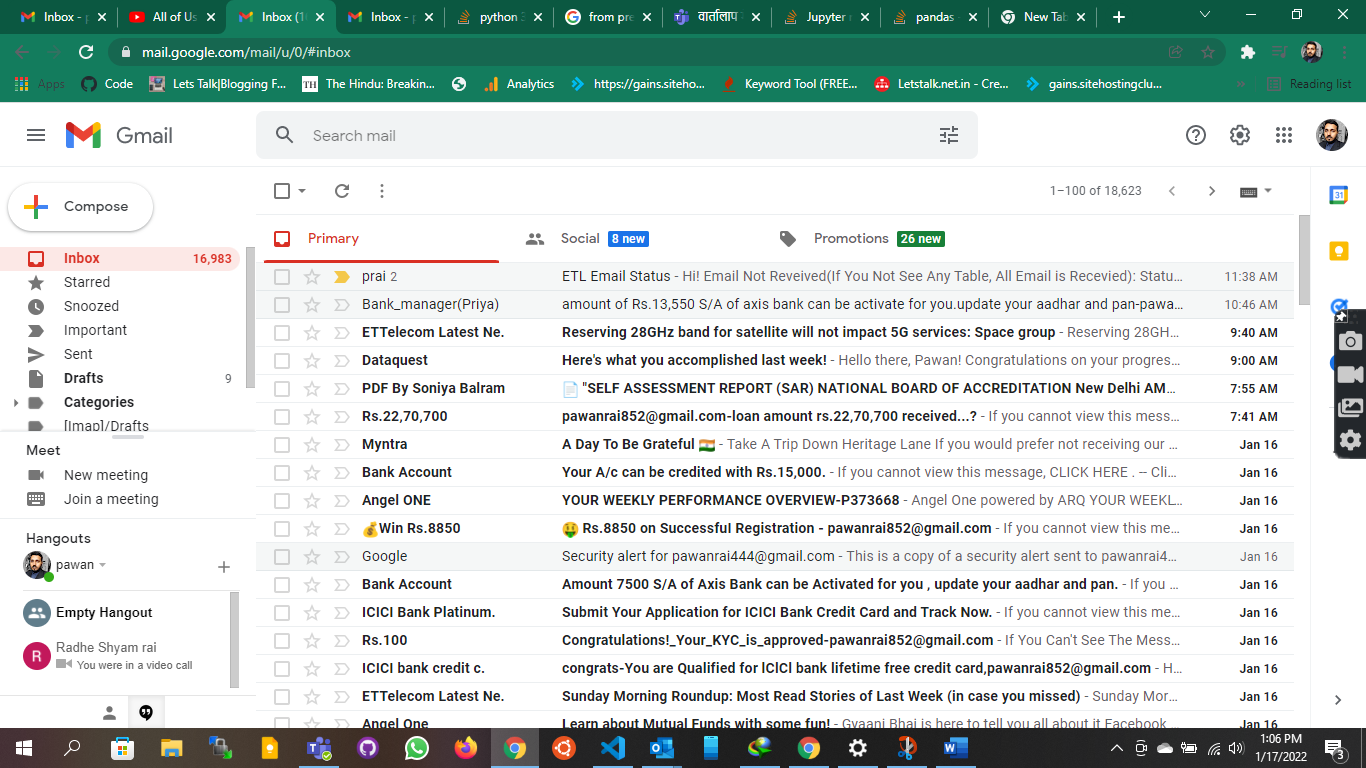
Open Any Email Account Which You want to Connect
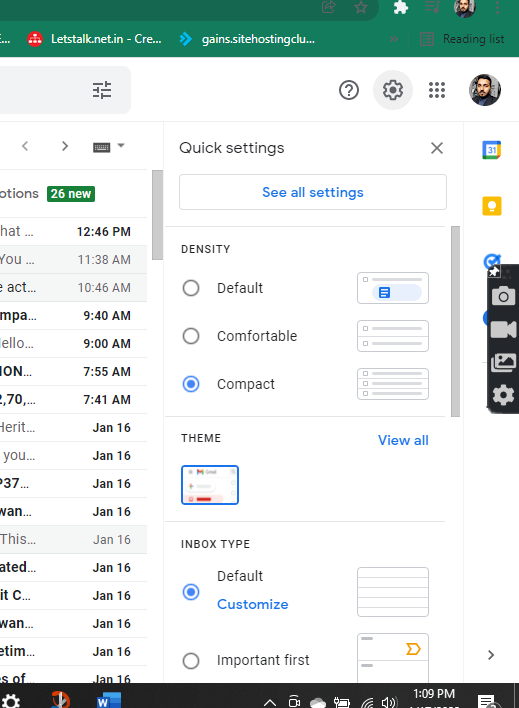
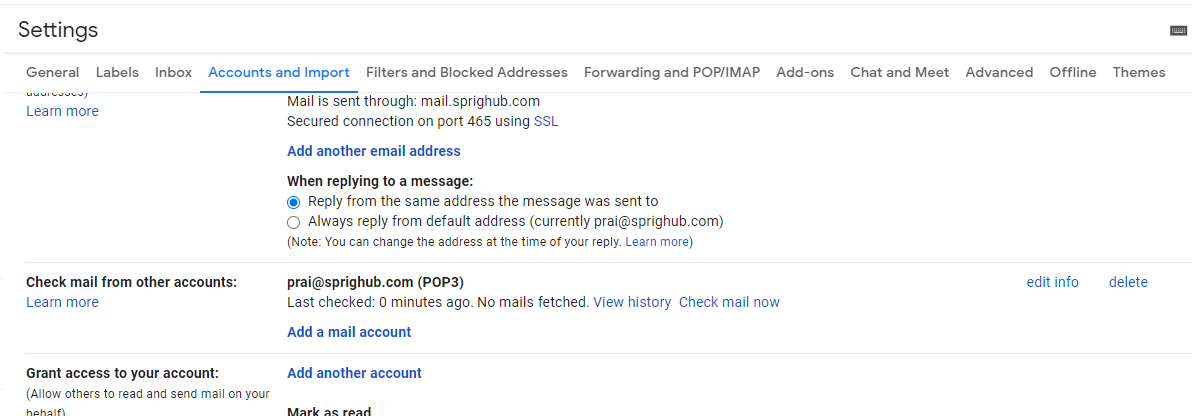
Click on Setting Option on Top Right corner of the Screen
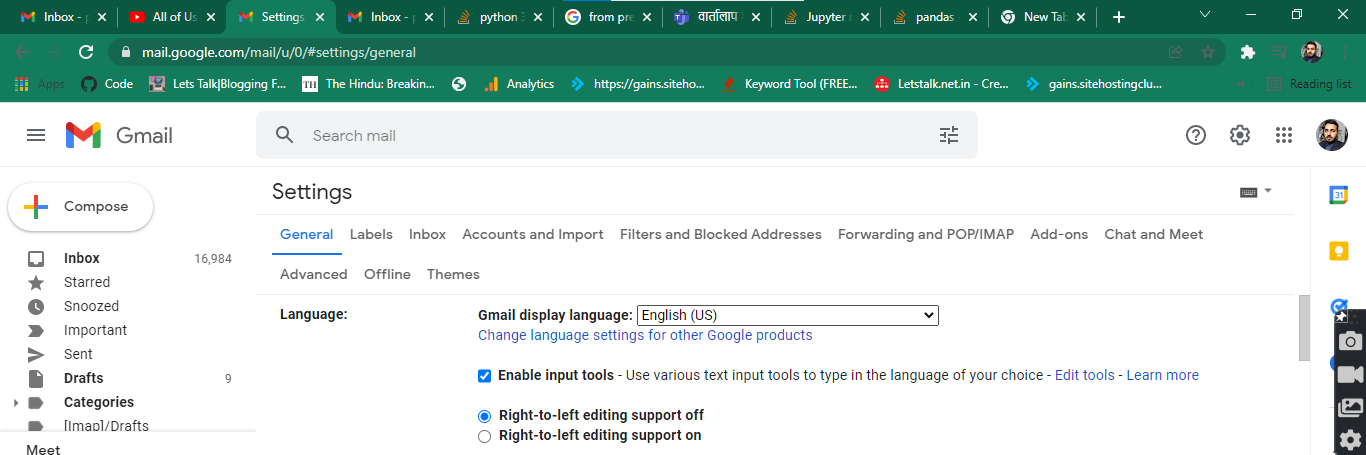
Click on >> See All Settings
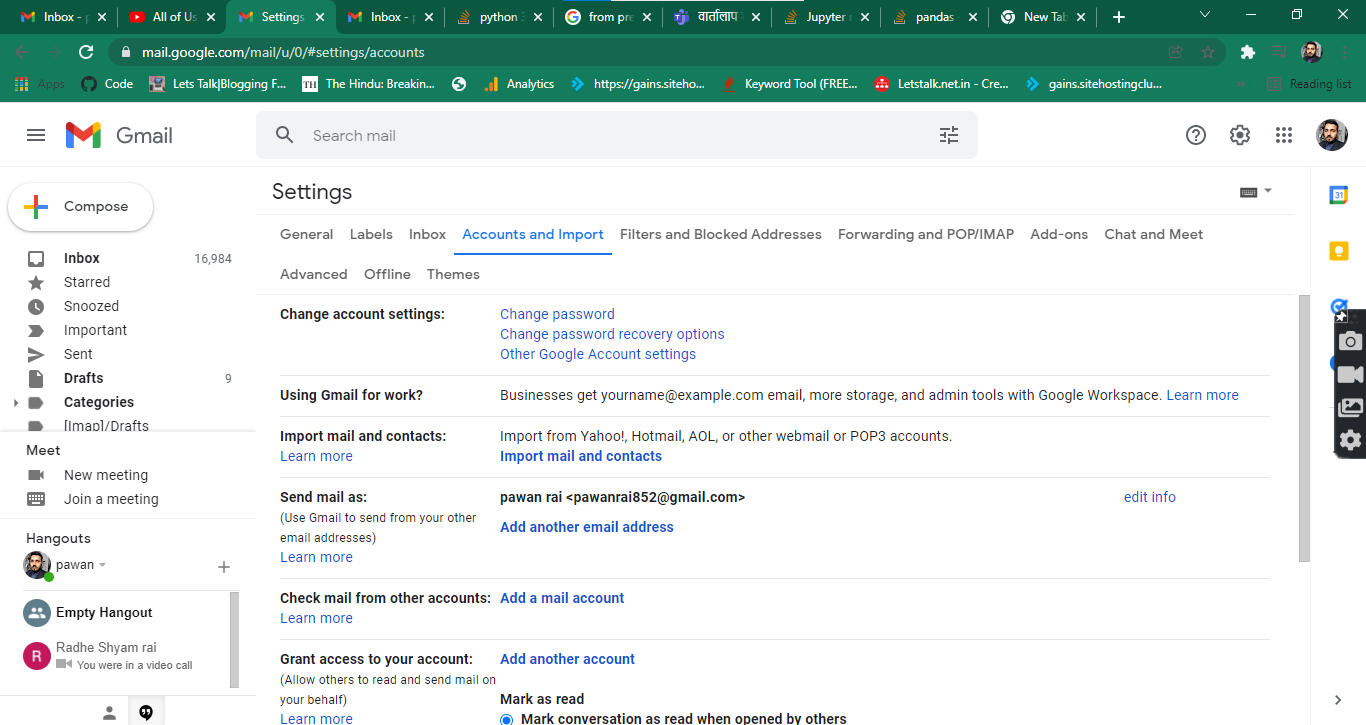
Go to >> Account and Import
Find Option Check Email From Other Account
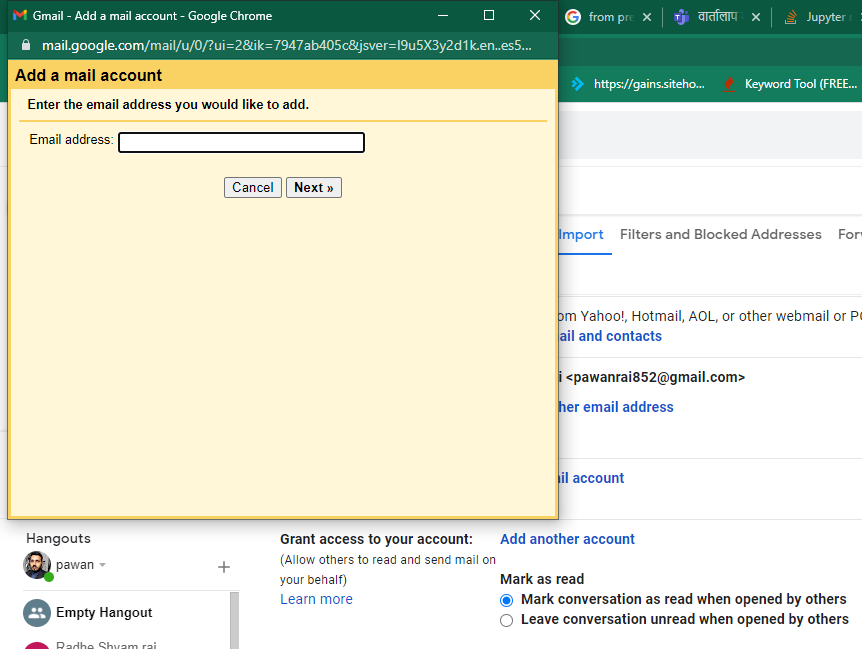
Select >> Add a mail account
A Yellow Pop-up Window Appear Like this
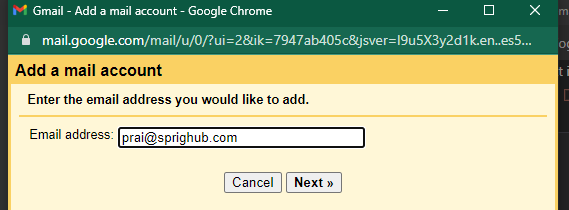
Provide Email Id Here >> Next >>
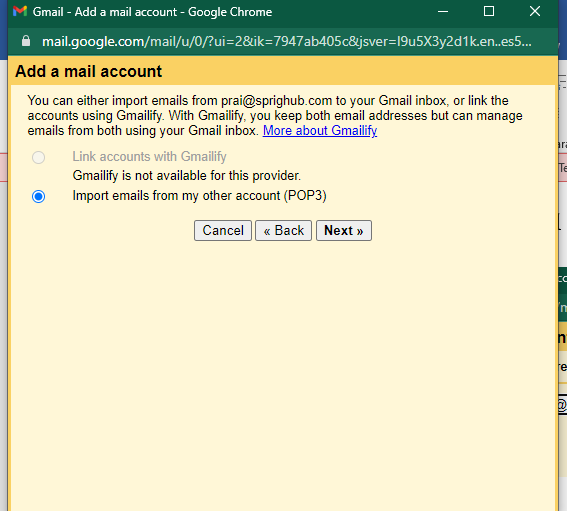
Select POP3 for Importing Email >> Next >>
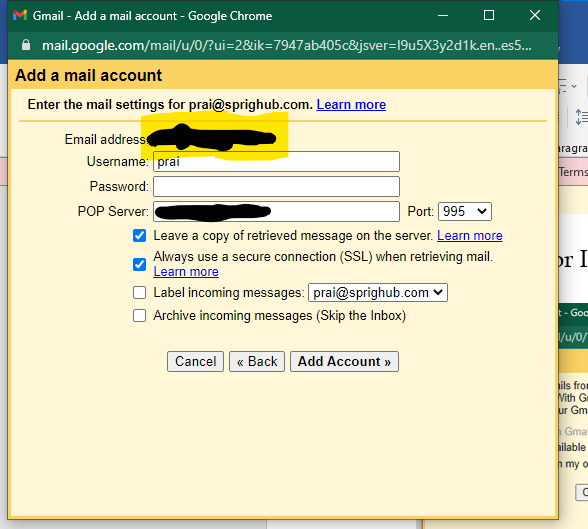
Provide the Password and select Port 995 for SSL and 993 for non-SSL
https://support.google.com/mail/bin/answer.py?ctx=gmail&answer=21289&hl=en&authuser=0
And Click Add Account and after This Look Like this
After this It will take all Email From Server and Make a Copy on Gmail
This Will take a Hour or two to Make the Copy of all Emails
Note : You May Face a Delay in Emails about 10 to 15 Mins
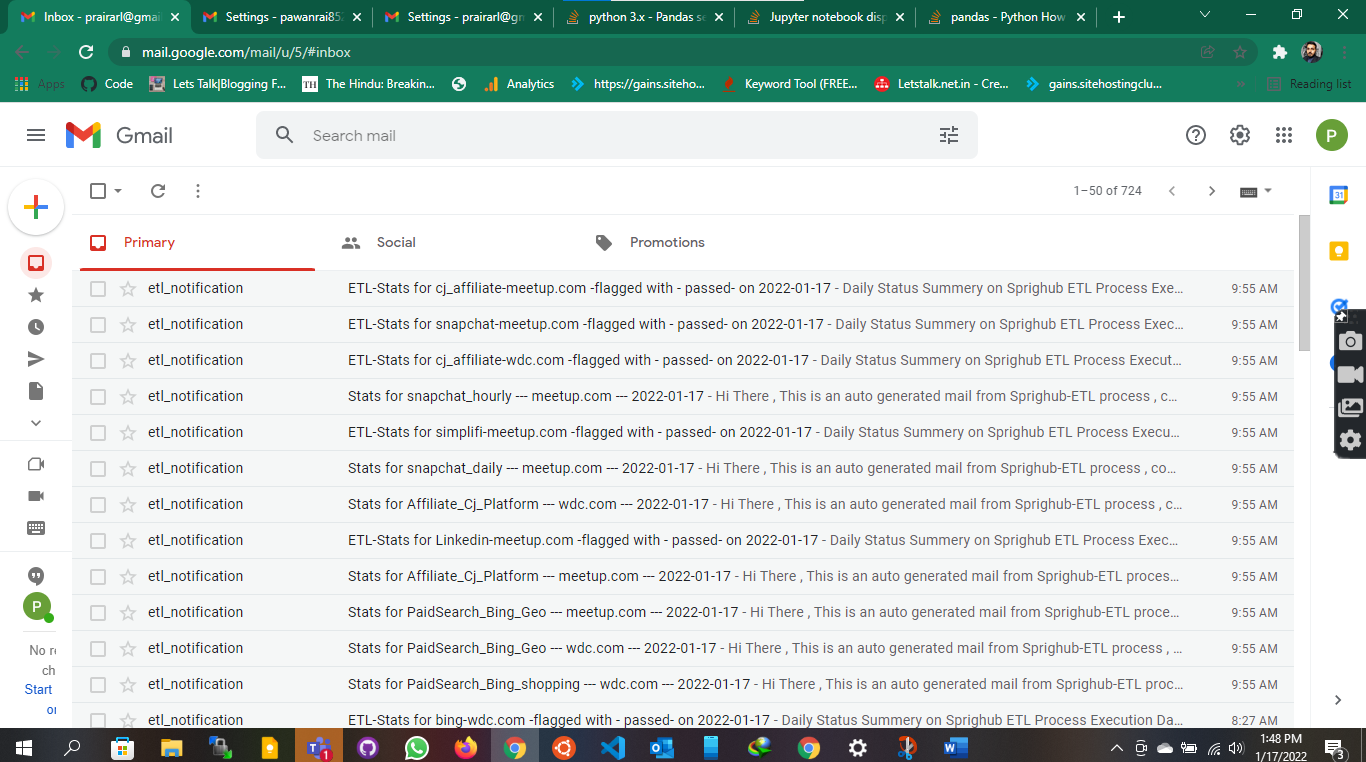
Email Look Like this On Gmail(Create a New Gmail Account For Testing Purpose & Safety Concerns)
So When I Received Emails from Company its time to Read Emails.
I Separated the 18 Email in Two Parts
Stats Email
ETL with Status
Reading Email with Selenium Python
Requirements for Stats Email
import pandas as pd
from selenium import webdriver
from time import sleep
from selenium.webdriver.chrome.options import Options
from selenium.webdriver.common.keys import Keys
from selenium.webdriver import ActionChains
import numpy as np
from bs4 import BeautifulSoup
Step Second:
Login To Gmail With Selenium
driver = webdriver.Chrome(‘./chromedriver’)
driver.maximize_window()
driver.get(r’https://accounts.google.com/signin/v2/identifier?continue=’+\
‘https%3A%2F%2Fmail.google.com%2Fmail%2F&service=mail&sacu=1&rip=1’+\
‘&flowName=GlifWebSignIn&flowEntry = ServiceLogin’)
driver.implicitly_wait(15)
loginBox = driver.find_element_by_xpath(‘//*[@id =”identifierId”]’)
loginBox.send_keys(‘prairarl@gmail.com’)
nextButton = driver.find_elements_by_xpath(‘//*[@id =”identifierNext”]’)
nextButton[0].click()
passWordBox = driver.find_element_by_xpath(
‘//*[@id =”password”]/div[1]/div / div[1]/input’)
passWordBox.send_keys(‘heroishere’)
nextButton = driver.find_elements_by_xpath(‘//*[@id =”passwordNext”]’)
nextButton[0].click()
sleep(5)
Third Step :
Apply Filter to Gmail
filter_url = driver.get(‘https://mail.google.com/mail/u/0/#search/is%3Aunread+from%3A(etl_notification%40sprighub.com)+Hi+There’)
Filter Say : Read All unread Email Come From elt_notification@sprighub.com and Starts with Hi There
Fourth Step:
Read Email has three Steps
Email1 = driver.find_element_by_xpath(“/html/body/div[7]/div[3]/div/div[2]/div[1]/div[2]/div/div/div/div/div[2]/div/div[1]/div/div/div[6]/div[2]/div/table/tbody/tr[1]”).click()
sleep(4)
data1 = driver.find_element_by_xpath(‘/html/body/div[7]/div[3]/div/div[2]/div[1]/div[2]/div/div/div/div/div[2]/div/div[1]/div/div[2]/div/table/tr/td[1]/div[2]/div[2]/div/div[3]/div/div/div/div/div/div[1]’).get_attribute(‘outerHTML’)
driver.back()
Click on email inside Filter list
Wait for load
Read Email for required Data
Then Click Back
Repeat This Steps for Every Email Which is needed to Fetched
Now Read the Extracted data
Step First
from bs4 import BeautifulSoup
soup1 = BeautifulSoup(data1,’lxml’)
soup2 = BeautifulSoup(data2, ‘lxml’)
soup3 = BeautifulSoup(data3, ‘lxml’)
soup4 = BeautifulSoup(data4, ‘lxml’)
soup5 = BeautifulSoup(data5, ‘lxml’)
soup6 = BeautifulSoup(Data6, ‘lxml’)
soup7 = BeautifulSoup(Data7, ‘lxml’)
soup8 = BeautifulSoup(Data8, ‘lxml’)
soup9 = BeautifulSoup(Data9, ‘lxml’)
Beautiful soup help us to read and modify html Table
Created Empty list to Store Data
first = []
second = []
third = []
fourth = []
fifth = []
sixth = []
seventh = []
eighth = []
nineth = []
Extract and Save Data in list
for i in soup1.findAll(‘b’):
first.append(i.text)
for i in soup2.findAll(‘b’):
second.append(i.text)
for i in soup3.findAll(‘b’):
third.append(i.text)
for i in soup4.findAll(‘b’):
fourth.append(i.text)
for i in soup5.findAll(‘b’):
fifth.append(i.text)
for i in soup6.findAll(‘b’):
sixth.append(i.text)
for i in soup7.findAll(‘b’):
seventh.append(i.text)
for i in soup8.findAll(‘b’):
eighth.append(i.text)
for i in soup9.findAll(‘b’):
nineth.append(i.text)
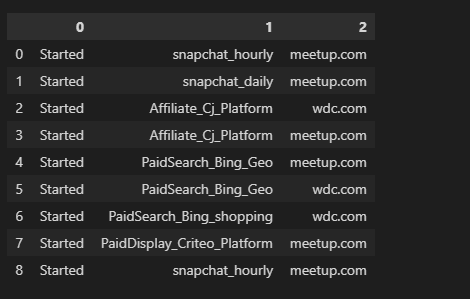
Prepare The DataFrame
df =[[‘Started’, first[0], first[1]],
[‘Started’, second[0], second[1]],
[‘Started’, third[0], third[1]],
[‘Started’, fourth[0], fourth[1]],
[‘Started’, fifth[0], fifth[1]],
[‘Started’, sixth[0], sixth[1]],
[‘Started’, seventh[0], seventh[1]],
[‘Started’, eighth[0], eighth[1]],
[‘Started’, nineth[0], nineth[1]]]
df1_Started = pd.DataFrame(df)
df1_Started
Dataframe Look Like this
How To Read ETL with Status
Login Mail Same before
Filter is Change here
filter_url = driver.get(‘https://mail.google.com/mail/u/0/#search/is%3Aunread+from%3A(etl_notification%40sprighub.com)+Daily’)
Read Email
Email1 = driver.find_element_by_xpath(“/html/body/div[7]/div[3]/div/div[2]/div[1]/div[2]/div/div/div/div/div[2]/div/div[1]/div/div/div[6]/div[2]/div/table/tbody/tr[1]”).click()
sleep(4)
data1_etl_status = driver.find_element_by_xpath(‘/html/body/div[7]/div[3]/div/div[2]/div[1]/div[2]/div/div/div/div/div[2]/div/div[1]/div/div[3]/div/table/tr/td[1]/div[2]/div[2]/div/div[3]/div/div/div/div/div/div[1]/div[2]/div[3]/div[3]/div/div[2]’).get_attribute(‘outerHTML’)
driver.back()
Same as Before but Path Has been Changed
Repeat the Step for Every email
Extract Data From above data1_etl_status
tbl1 = pd.read_html(data1_etl_status)
table4_df = tbl1[0]
# table4_df.columns = [‘Name’, ‘Value’]
platform = table4_df.iloc[2,1]
client = table4_df.iloc[1,1]
status = table4_df.iloc[5,1]
FirstSave = [client,platform]
print(client, ‘platform’, platform, ‘is’, status)
For every Email we have to Do this Step
Create Two List one for Predefined list which email should have come and Other one is Fetched list Which Email come
Predefined_list = [[‘meetup.com’,’simplifi’], [‘meetup.com’, ‘snapchat’], [‘meetup.com’,’Linkedin’], [‘meetup.com’, ‘cj_affiliate’], [‘meetup.com’, ‘bing’], [‘meetup.com’, ‘criteo’], [‘wdc.com’, ‘bing’], [‘wdc.com’,’criteo’], [‘wdc.com’,’cj_affiliate’]]
List_Fetched = [FirstSave, SecondSave, ThirdSave, FourthSave, FifthSave, SixthSave, SeventhSave, EighthSave, NinethSave]
Compare The both Dataframe for mismatch
df1 = pd.merge(df_Predefined, df_List_Fetched, on=[‘Client’,’Platform’], how=’left’, indicator=’Exist’)
df1[‘Exist’] = np.where(df1.Exist == ‘both’, True, False)
new_df = df1
df2 = new_df[new_df[‘Exist’] == False]
and Find Difference and Create Data frame with Difference
After Finding the Difference we need to send the Difference Via Email
Sending Both DF as inside the Email
import smtplib, ssl
from email.mime.text import MIMEText
from email.mime.multipart import MIMEMultipart
from pretty_html_table import build_table
sender_email = “prai@sprighub.com”
receiver_email = “pawanrai852@gmail.com”
password = input(“Type your password and press enter:”)
message = MIMEMultipart(“alternative”)
message[“Subject”] = “ETL Email Status”
message[“From”] = sender_email
message[“To”] = receiver_email
# Create the plain-text and HTML version of your message
text = “””\
Hi
Email Not Received For Platform Mention Below,
“””
html = “””\
<html>
<body>
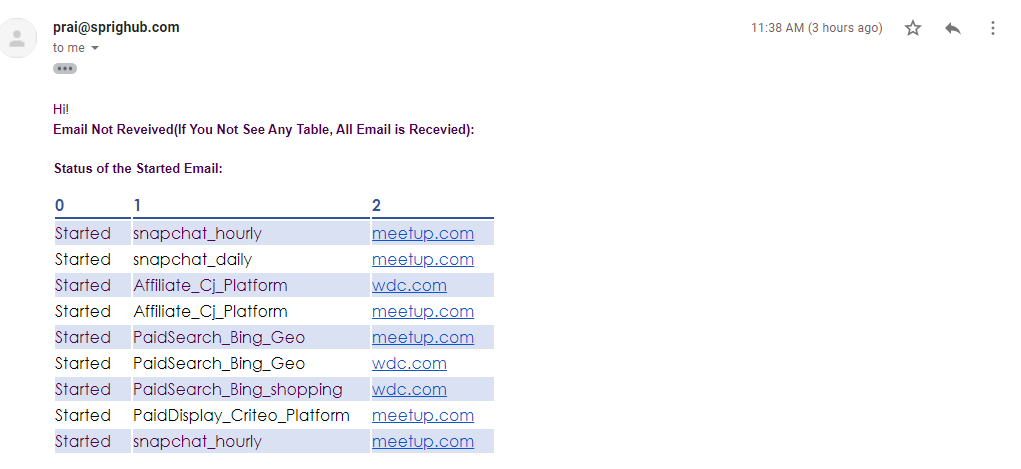
<p>Hi!<br>
<b>Email Not Reveived(If You Not See Any Table, All Email is Recevied):</b><br>
{0}
<br><b>Status of the Started Email:</b><br>
{1}
<br>
Thanks & Regards,
</p>
</body>
</html>
“”” .format(build_table(df2, ‘blue_light’), (build_table(df1_Started, ‘blue_light’)))
# Turn these into plain/html MIMEText objects
part1 = MIMEText(text, “plain”)
part2 = MIMEText(html, “html”)
# Add HTML/plain-text parts to MIMEMultipart message
# The email client will try to render the last part first
message.attach(part1)
message.attach(part2)
# Create secure connection with server and send email
context = ssl.create_default_context()
with smtplib.SMTP_SSL(“mail.sprighub.com”, 465, context=context) as server:
server.login(sender_email, password)
server.sendmail(
sender_email, receiver_email, message.as_string()
)
Email Look Like This
If there is Difference in Expected Email and Received Emails then there are two table but Today we Did not miss any Emails so only one table is their Which is Stats Table.